

Close Menu
Amaryllis Lane
  • Home Decor
    • Home Improvement
    • Interior Design
    • Room by Room
    • Small Changes, Beautiful Results
    • Worth a Look
  • DIY
    • Crafts & Handmade
    • DIY Projects
    • Organization & Storage
  • Reader Favorites
    • Made by Hand
    • One More Idea
  • Recipes & Cooking
    • Baking & Desserts
    • From the Kitchen
    • Kitchen & Dining
    • Make It Your Own
    • Seasonal Living

Subscribe to Updates

Get the latest creative news from FooBar about art, design and business.

What's Hot

How to Make Pockets Deeper

Machine Embroidery on Minky Fabric

Full Coverage Apron Free Pattern

Facebook X (Twitter) Instagram
Amaryllis Lane
  • Home Decor
    • Home Improvement
    • Interior Design
    • Room by Room
    • Small Changes, Beautiful Results
    • Worth a Look
  • DIY
    • Crafts & Handmade
    • DIY Projects
    • Organization & Storage
  • Reader Favorites
    • Made by Hand
    • One More Idea
  • Recipes & Cooking
    • Baking & Desserts
    • From the Kitchen
    • Kitchen & Dining
    • Make It Your Own
    • Seasonal Living
Subscribe Now
Facebook X (Twitter) Instagram
Amaryllis Lane
You are at:Home»Crafts»How to Transfer a Design with a Pencil
Crafts

How to Transfer a Design with a Pencil

ElizaBy ElizaSeptember 29, 20260183 Mins Read
Share Facebook Twitter Pinterest LinkedIn Tumblr Email
How to Transfer a Design with a Pencil Featured Image
Share
Facebook Twitter LinkedIn Pinterest Email

Have you ever wondered how people make those perfectly painted signs? Well, there are many different ways to achieve the same look, but this is one I learned in an art class back in school. I’ll show you how I transfer a printed design with a pencil as a guide to paint.

This method works great on things like wood, paper, cardboard, etc.

Learn How to Transfer a Design onto Wood

Pick a design that you would like to trace. For this example, I am using this design you can download for free. But you can transfer anything you can print out on a piece of paper.

1 | Print the Design
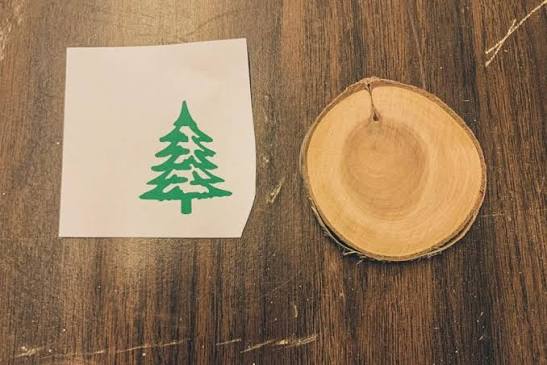
Tree design template beside a wood slice

Print out your design the size you would like your end design to be. For this project, I am using a 3-inch diameter wood slice. If you haven’t read my tutorial on how to make DIY Wood Slices yourself for free, you can read about it here.

2 | Shade the back with a Pencil
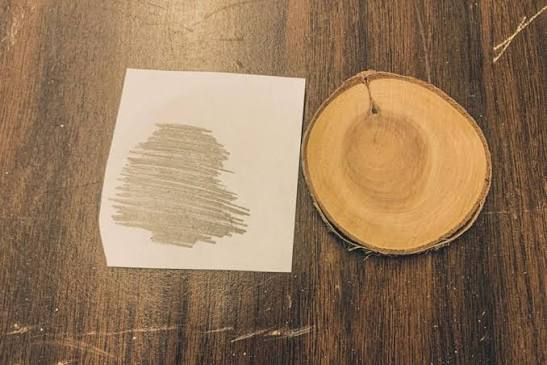
Next, flip the design over and color over the back of the paper with a pencil.

It is important to make sure it is a graphite pencil (a regular writing pencil) and not a colored pencil. The colored pencils contain wax and will not transfer as a regular writing pencil will. A darker drawing pencil is a great option as well and will help your design stand out more against the wood grain.

Make sure to shade the entire back of the design.

3 | Trace onto the Wood
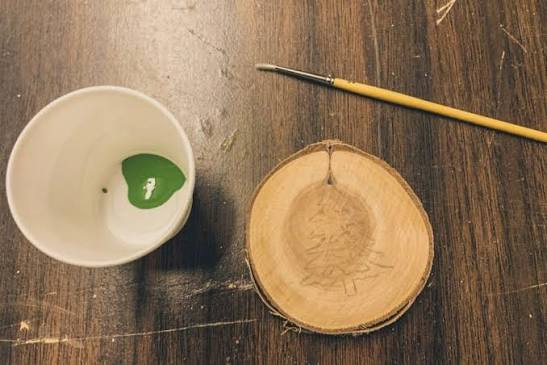
Tape your design into place and trace over your design. I prefer to use masking tape, but paint tape will work too.

You will want to use a bit of pressure while tracing your design.

4 | Finish with your Preferred Method
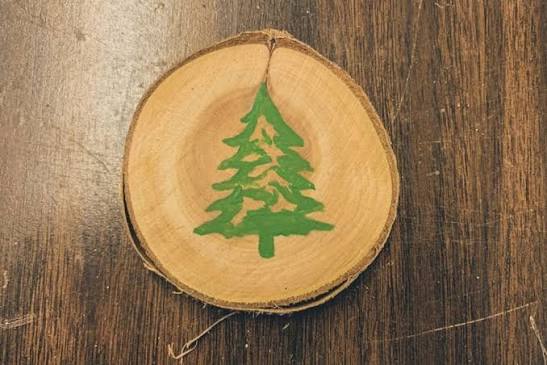
Now that you’ve learned how to transfer a design with a pencil, you’ll want to pick how you would like to finish your design. These are just a couple of examples of the many ways to finish your designs!

Paint

For this wood slice, I painted over the traced on design. You can also use a paint pen and, with some wood, you can use a Sharpie. If you decide to use a Sharpie, make sure to test it on the back first, because it can feather and bleed on some types of wood. The Christmas Tree design can be downloaded for free here.

I personally didn’t care if my design turned out perfect, so I took a little liberty when painting the inner part of the tree.

Pyrography (Wood Burning)

For this wood slice, I burned the flower design into the wood with a wood-burning tool. I’m relatively new to pyrography, so it isn’t perfect. (For this design, I used this free design from Craft House SVG)

As always, I’m happy to help with any comments, questions, or concerns! I would LOVE to see the creative projects you come up with! Add pics of your projects to the comments below! Happy crafting!!!

Previous ArticlePeanut Butter Gems
Next Article Vintage Dresser Restoration Process
Avatar photo
Eliza

Eliza is a blogger, content creator, and DIY enthusiast who loves turning creative ideas into approachable projects. At Amaryllis Lane, she shares practical DIY tutorials, creative inspiration, and ideas readers can recreate at home. Her work focuses on making projects easier to understand, from the creative process and materials to the steps that bring each idea together.

Related Posts

DIY Wood Slices from Recycled Tree Clippings

September 28, 2026

Easy Crochet Dish Scrubby

September 28, 2026
Add A Comment
Leave A Reply Cancel Reply

Top Posts

Reusable Grocery Bags Sewing Tutorial + FREE Pattern

September 28, 2026268 Views

Easy Baby Blanket Tutorial

September 28, 2026195 Views

DIY Wood Slices from Recycled Tree Clippings

September 28, 202683 Views
Latest Reviews

Amaryllis Lane Newsletter

Fresh decorating ideas, easy DIY projects, and delicious recipes delivered straight to your inbox.

Amaryllis Lane

Thoughtful ideas for beautiful everyday living. Discover inspiring home decor, practical DIY projects, delicious recipes, and simple ways to make your home feel more like you.

Inspired Living, Made at Home

Our Picks

How to Make Pockets Deeper

Machine Embroidery on Minky Fabric

Full Coverage Apron Free Pattern

Subscribe to Updates

Get the latest creative news from FooBar about art, design and business.

© 2026 AmaryllisLane.com. All Rights Reserved.
  • Privacy Policy
  • About Us
  • Contact Us
  • Team Members

Type above and press Enter to search. Press Esc to cancel.