Faux Leather Drawstring Backpack

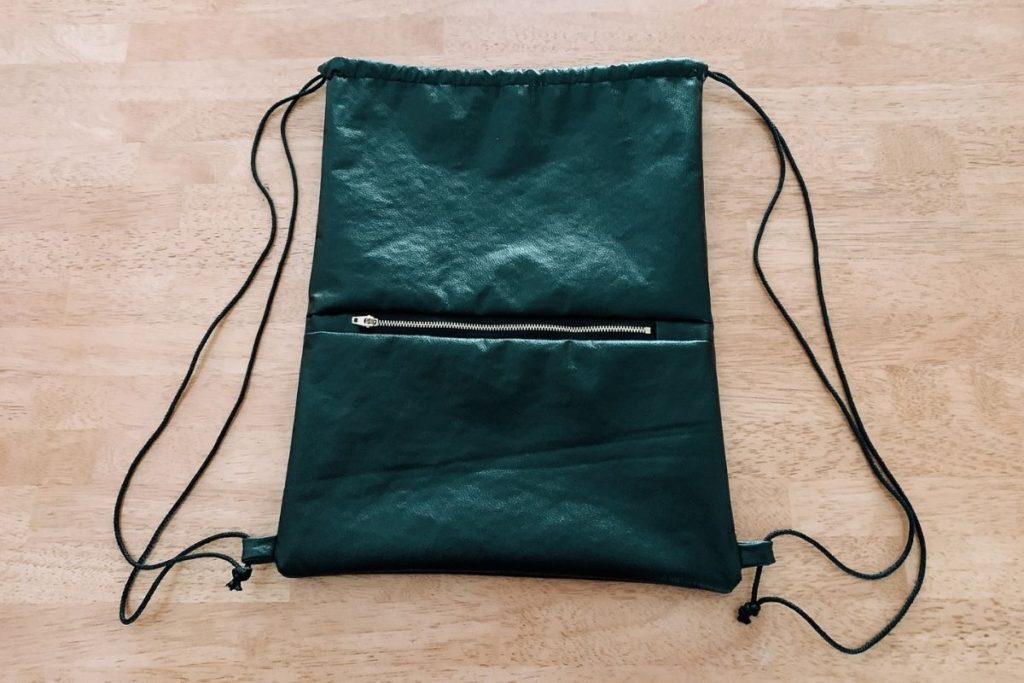
Happy Friday! Today I’m going to show you how to make your own Faux Leather Drawstring Backpack! It is cute, stylish, and adds to any outfit! And guess what! It is super affordable to make! Between awesome sales and coupons at Joann’s, I literally only spent $12 for this cute and stylish little backpack!
Faux Leather Drawstring Backpack Tutorial
You will need:
- 1/2 yard Faux Leather (preferably from the home decor section so it has the backing on it)
- 1/2 yard Lining (I just used quilting cotton)
- 9″ Zipper
- 4ish yards 1/8″ Lacing Cord
(it will depend on how long you want the straps)
- Scissors
- Thread
- Sewing Machine
- Zipper Foot
- Sewing Clips (these work a lot better than pins for this type of project)
- Paint Tape or Masking Tape (Optional)
For this project, I use a 1/4″ seam allowance, but you can use a different seam allowance as long as you keep it consistent.
1 | Cut Out the Pieces
First, you will want to cut out all the pieces. I just used a cutting mat and ruler, but you can trace it out and cut the pieces with scissors.
Faux Leather

Cut list:
- 18″x14″ 1 piece
- 10″x14″ 1 piece
- 8″x14″ 1 piece
- 2″x3″ 2 pieces
- 1.5″x4″ 2 pieces
Lining

Cut list:
- 18″x14″ 2 pieces
- 10″x14″ 1 piece
- 8″x14″ 1 piece
- 2″x3″ 2 pieces
2 | Sew the Zipper Ends
We will start off by sewing the ends onto the zipper. Place the zipper facing upright on the table. Pin your 1.5″x4″ piece of faux leather wrong side up leaving a 1/2″ past where the metal of the zipper begins. It should look like this:


Flip the zipper upside down and pin a 1.5″ x4″ piece of lining fabric to the back of the zipper making sure to line up the lining fabric with the faux leather fabric on the other side.

Sew across the zipper leaving a 1/2″ seam allowance.

And the first side is done!

Repeat on the other side. Ultimately, you should have something that looks like the picture below.

3 | Switch to the Zipper Foot
If you are unfamiliar with a zipper foot, this is it:

A zipper foot has one wide foot in the center instead of two narrow feet on either side. The left side of the foot will butt up against the zipper, guiding you to sew a consistent seam.
4 | Sew in the Zipper
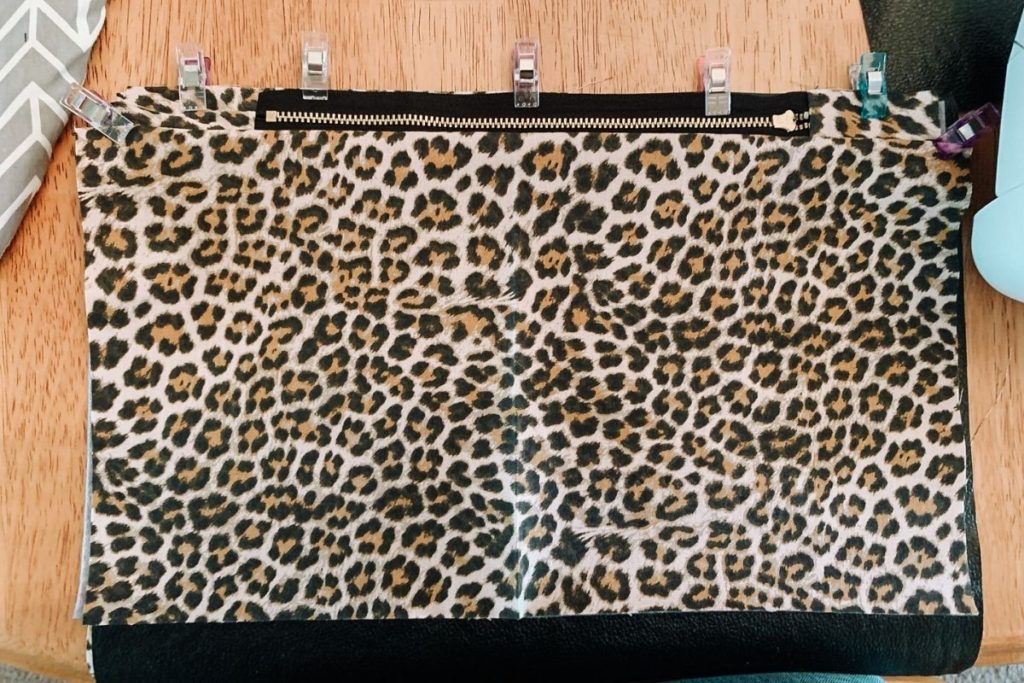
Now that we’ve sewn the ends of the zipper, it’s time to sew it into the bag! start by placing the 8″x14″ piece of faux leather face up on a solid surface. Lay the zipper face down across the top of the faux leather. Then, layer the 8″x14″ piece of lining face down on top of the zipper and faux leather. Line up the top edges and pin or clip into place. Sew a seam along the side of the zipper leaving about a half-inch gap at both ends.

Once sewn, flip the lining over to the other side of the faux leather so that wrong sides are facing each other.

Now we are ready to sew the other side to the zipper piece. Place the 10″x14″ piece of faux leather face up on your flat surface. Next, lay the sewn section faux leather side down with the zipper section at the top.

Now place the 10″x14″ piece of lining face down on top of the current stack. Pin across the top where the zipper is.

Now sew a seam across the top leaving a half-inch gap at either end.
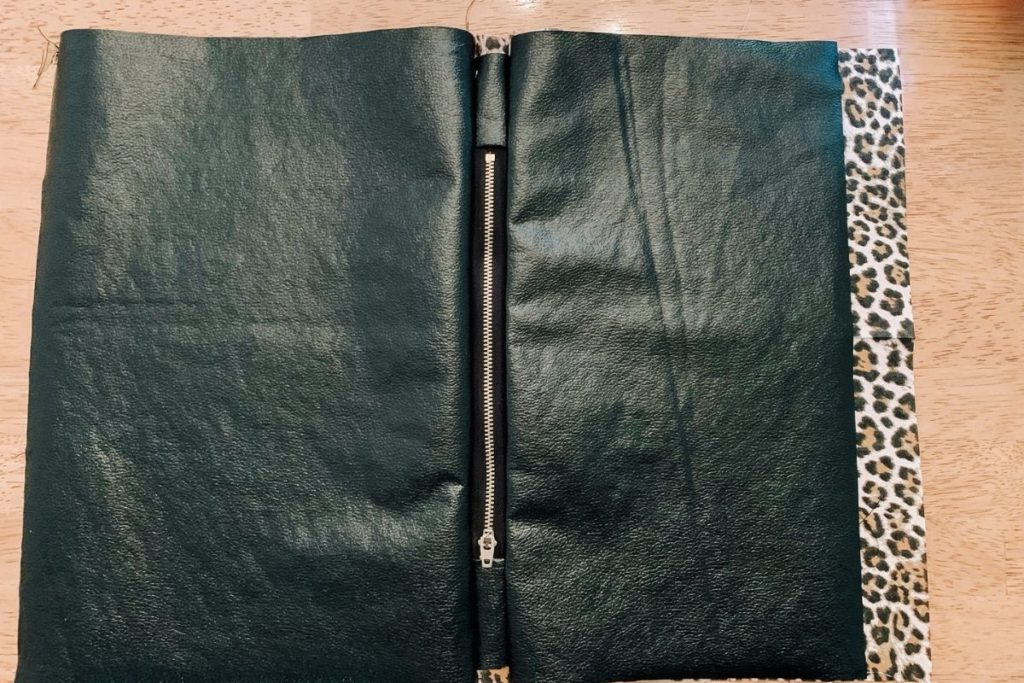
The outside (faux leather side) should look like this:

And the inside (lining side) should look like this:

Now switch back to your regular sewing machine foot.
5 | Sew the Inner Pocket
Now we are going to take the sewn piece and fold the lining together with rights sides facing each other and the faux leather side with right sides facing each other. Note: we are only going to be sewing the lining fabric in this step. Line up the ends of the lining fabric and pin in place. One side of the lining is going to be slightly longer than the other. This is what we want. We want to line up the ends so that the extra fabric is toward the zipper at the far end of the lining fabric (the middle of the sewn section.)

Sewing from the bottom corners, sew up toward the overhang at the top. This will ensure that it is even on both sides. Make sure to hold the faux leather back so that you do not catch it in this seam. Then sew a seam across the bottom. This zipper pocket should now be fully enclosed.

6 | Sew the Bottom Tabs
Using the two 1.5″x4″ pieces of faux leather, we are going to make the little tabs at the bottom sides of the backpack. Fold each piece in half lengthwise and sew a seam along the open edges. You should have something that looks like this:

Turn the tabs right side out. It does take a little bit of wrangling to turn them due to the faux leather sticking a bit. Just be patient.

Flatten the tabs with the seam on the bottom. Note that I used clips to flatten these out. An iron will melt faux leather, so pressure is the best method to flatten the seams.

7 | Sew the Tops
With the remaining 18″x14″ pieces of faux leather and lining, line up the top edge and sew a seam across the top. See the red dotted line in the diagram below.

Do the same with the remaining 18″x14″ pieces of faux leather and lining.

Now place these sewn pieces with rights sides facing each other. Place the folded tabs in between the pieces of faux leather lined up with the side edges.


Sew along the dashed lines leaving about a 4-5″ gap at the bottom of the lining side. Make sure to catch the edges of the tabs in your seam (see below.) We will use this in a minute to turn the bag right side out.
8 | Turn It Right Side Out
Using the gap we left in the lining, turn the bag right side out.

It should look like this:

Pin the gap closed and topstitch the bottom of the lining shut.

9 | Tuck the Lining In
Next, we will tuck the lining inside the bag. In the picture below, I have clipped around the rim of what will be the top of the bag.

Laying flat, it should look like this:

10 | Sew the Top
Using paint tape, rim the outside of the bag opening. (Note you want to use newer paint tape because the older tape will be more brittle making it harder to remove.) You can skip this part if you have and are comfortable with the Teflon foot. I haven’t had much luck with the Teflon foot, so I use painter’s tape to prevent the faux leather from getting stuck.

Here we are going to use about 3/4″ seam allowance so that there is enough room to put the drawstring through. If you are using a thicker lacing or rope, make this seam a little wider to give you enough space.

Once you’ve sewn it, peel off the tape. For me, it came off in just a couple of pieces, but in the past when I have used old tape, it comes off in a lot more pieces which are kind of a pain.

With a seam ripper, carefully pull out a 1/2″ section of the seams on each side at the top of the bag. This is where we will thread the drawstrings through.

11 | The Drawstrings
Cut the lacing or rope into two 72″ pieces. Depending on your own preferences you may want these a little shorter but these are standard measurements of a few other drawstring backpacks. (I ended up shortening the length of the drawstrings on my own backpack a little since I’m kinda small.)

Wrap tape around the ends of the lacing to make aglets (this will help us thread the lacing through the top of the bag without unraveling.) Poke a safety pin through one of the ends and lock it into place. Use the safety pin to guide the lacing through the top of the bag. Tie the ends through the tabs and trim off the taped ends.

12 | Done!
Now its time to get out and show off your new Faux Leather Drawstring Backpack that ads to any outfit!

As always, I am happy to help you out if you have any questions, comments, or concerns! I would love to see how your Faux Leather Drawstring Backpack turned out!
You can find more DIY projects here!


One Comment
Komal Singh
I was always curious about how comfortable these were. Thanks for sharing your honest thoughts. 💙